Saturday, July 27, 2013

Comparing Contrasts

As I mentioned at the end if my last post, I did a Latin-related manicure in mid-July and it was so helpful in class that I left it on for nearly two weeks and tolerated much more chipping from it than I would have from a manicure that was not also an infographic

You guys are probably not that interested in Latin grammar, so I won't explain the whole thing here. Let it suffice to say it involved each nail bearing one (or, for the thumbs, two) Roman numerals, which were not that hard to do with the skinny brushes I have in black and white. 

For the background I chose a taupe which I bought with the intention of using as a French manicure base. It made a great base for this too and I am looking forward to using it as a canvas for more designs in the future. 

 
Here you can see that I did some of the Roman numerals in white and some in black. They both looked good on the beige base but I was especially inspired by the visual contrast between the nude and the black numbers that looked almost like wild animal scratch marks from a 60's movie with a jungle vixen. The name of the base polish bears me out on this one - it's called Fashion Safari (from New York Color). 

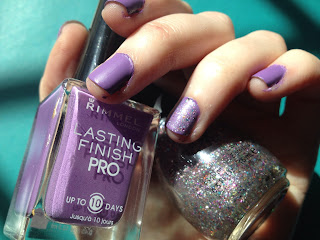
This week, I switched to a contrast between my finger and toe polishes. I have been trying to figure out how to wear this extreme orange Reign in Spain Birchbox sent me recently. It's not easy because it really looks ghastly against my pale skin. It might make an all right accent color (haven't tried that yet) and it came out rather well on the toes with a layer of purple-toned sparkles in top. 

The conventional wisdom to make toes' and fingers' colors seem logical together without being too matchy-matchy is to choose colors across the color wheel from each other. (A concept you probably remember from sixth grade art class.) That's what I did this week, choosing an unadorned purple for my fingers. 


On the topic of toes, do you guys have a favorite length for your toenails? I think I cut mine too short this time, but I hate how they look like talons when they get too long! What do you think?

Wednesday, July 10, 2013

Two Recent Looks: Mermaid and Chevron

This is what I have been up to recently: 

- Going to pretty churches. 

- Reading a lot of Latin. 

- Going to Milwaukee's Summerfest music festival with my roommate and her friends, who were really into saying they were mermaids? (Kids these days!) Anyway, my nails that night happened to be somewhat appropriate:


Although one of them was wearing a deeper blue that was more wine-dark than sea foam. 

- Working out regularly. Yay for sore muscles!

- Trying out a chevron look on my nails. This has been a crowd-pleaser in the streets of Milwaukee. 


This look was, surprisingly, easier to achieve on my right hand than my left. I'm looking forward to getting more adept with the thinner brushes I used for this and have a Latin nail project (only me, right?) that will use them in the pipeline for next week. 

Til then, swim hard, mermaids ;)

Sunday, June 23, 2013

The Statement Nail

The statement nail - one nail that is accented with a different color, more intricacy, or more bling than the other ones - has been trendy for a while now. So much so that some folks have already moved on to the statement toenail. At the moment I'm wearing a very old school, classic, and classy red on my toes, so my "statements" have been confined to my ten upper digits.

Is there a right or wrong finger to pick as your statement? I am really curious what others' thoughts on this are. I have chosen to make all different nails stand out, and here's what I think:

Thumb - Good, but only as a sort of side-kick statement. Having all nine (or eight) other nails one way and one or both of the thumbs a different way might make it look like you forgot about them while you were painting your nails and not like you made a conscious choice for them to stand out. Thumbs already stand out. It's part of what makes us human.

Pointer finger - Bottom of the barrel in terms of a statement choice. My pointers usually get the most wear, so it's like drawing attention to the most-likely-to-chip nail. Also it sort of subtly feels like you're always pointing things out.

Middle finger - In the past (like, way in the past, think summer camp in the mid-90's) I've had people take a statement middle finger in the wrong way: a veiled f-you to everyone I meet. This is less likely of a reaction for me to get as a friendly thirty-something than it was as an angsty, baby-tee wearing teen, and I've done it this week.

I think statement nails tend to work particularly well when they are tied in with the rest of the manicure, as this solid gold statement on top of a gold-tipped French does.

What do you think, does it still seem like I'm flipping you off? I hope not! :)

Ring finger - The most visually appealing and most obvious choice, especially if you've just gotten engaged or are getting married. I tend to highlight my right ring finger, where I wear a claddagh ring my boyfriend got me and not my ringless wedding-band finger.

Pinky - Can come off a little weird because of how unbalanced it is visually, but I think it's a good weird and not a bad weird like the pointer finger. It's like an M Night Shyamalan movie: with an unexpected twist at the end, but less and less interesting the more often you've seen it.

What are your favorite fingers to make a statement with? Do you think statement nails are professional enough to wear to work? Are there any color schemes that work particularly well together? Let me know what you think!


Sunday, June 16, 2013

Happy Birthday to Me

Sometimes when you are spending the summer taking a very intensive Latin class, it's hard to feel like you're celebrating your birthday right. So this year I decided to get myself a mani/pedi and a massage at a salon in downtown Milwaukee. (Also I baked a cake.)


I chose good colors for both my hands and my feet: a shiny gray for my hands and a slightly more cherry than classic red for my feet. (Unfortunately I did not think to record brand and color names.) 


There is not much not to like about getting a pedicure: eucalyptus foot bath, massage chair, gentle exfoliation, ahhhh. 

Unfortunately I think I am too picky about my fingernails to like anything but a really expert manicure. I can be more precise about the shape of my nails with a nail clipper than this woman (who was very nice) could with a file. Also the manicure chipped, like, instantly. So I have already redone it with two Color Club colors, Status Update and Reign in Spain. 


You can see that, due to my slightly obsessive evening of the nail shape, the lengths of my nails are more uneven than I am usually okay with. Live and learn, I guess. Good lesson for a birthday. 

On the topic of learning, one of the best things about the whole experience was the manicurist telling me she really thinks it's worth it to get a base coat by Essie or OPI, especially considering how often I do my nails and how strong they are naturally. Professional advice has finally convinced me to put it on the list for my next Walgreens trip. 

Do you guys have any nail-related birthday routines? Any stories about disappointing professional manis? Dish!

Sunday, June 2, 2013

New week, new city, new nails

Not having to work on Sunday is a weird feeling. So is being in an apartment without Internet, which is exactly where I am right now, in Milwaukee. 

On days like these, I tend to create reasonably elaborate manicures and I also tend to spend a ridiculous amount of money at Walgreens (and not be able to really remember what it was I bought there several hours later).

One thing I do recall buying is gold glitter nail polish. Here's what a lonely and disoriented Sunday has resulted in in terms of my hands. 


I always take pictures on my phone so I don't know why updating from it leads to poorer photo quality but it does. 

Happy June, everyone! Wish me luck for meeting my new roommate and finding my class via the Milwaukee bus system tomorrow. (And for successfully obtaining the shockingly large quantity of items I forgot at Walgreens.)


Wednesday, May 29, 2013

More like "This Month's Nails"

So I haven't been posting for a while. Sorry! May is my busiest month at work. Also some exciting things have been happening in terms of employment (as opposed to subcontracting)... So send me your good vibes as I navigate various state and local bureaucracies!

Just because I have not been writing doesn't mean I have not been manicuring. Or photographing. So here are some recent looks my digits have been sporting!


One trend I have really liked is just a plain matte color in a paste-like tone. I did this with mauve and gray (apparently, though, I only photographed the gray in very bad lighting):


Just take my word for it - it looked awesome. I thought it was both stylish and professional enough to wear to my job interview.


This was photographed nearly a week after the manicure was actually done. It does show a little wear and tear, but really not that much. Another perk of the matte top coat is how well it improves polishes' staying power!


At the beginning of the month (I guess?) when my nails were short, I did a similar pastel look, but kept the polish's intended shimmery finish.


This look is not in fashion right now, but I think it is classic, classy, and totally worth having somewhere in my manicure rotation.


Another look I tried was floral-inspired nail art. I'd love to hear what you guys think about this because basically I hated both these looks and took them off pretty much right after photographing them. What do you think?


This incorporates the idea of petals, matte emerald, and pastel purple and pink. For some reason it didn't do it for me though. (Note my awesomely colored purple walls as the background, though.)


This, I realize, may not look floral at first glance, but is a riff on a dandy-lion themed dress I have. I think it's the yellow in it that's so irritating and I might try the design on the tips again with a different base color (teal? purple? gray?) underneath.


And finally, here is what my hands look like right now


I'm not sure whether I'll post more or less frequently during my super-busy summer... Thanks for hanging in there so far and stay tuned to find out!

Wednesday, May 1, 2013

Back on the Glitter Wagon

What can I say? Primates like shiny things. Here are three recent sparkled-up manicures:

1. White on White (with some gold mixed in too)


You can also see my fancy purple wall color. Yay purple!

I started out by thinking of this as white vs. white, since I started out by painting one hand with Sinful Colors' Snow Me White and the other with Color Club's French Tip to make a comparison between the two. I found, though, that the only real difference was maneuverability. True to the purpose expressed in its name, French Tip was much easier to handle than Snow Me White. Since it's cheaper, I think I'll stick with using this one as a base and reserve French Tip for, well, french tips.

Something about this manicure that I loved but that did not show up well in any pictures was actually the white on white part. On top of the white bases mentioned above, I put a layer of Sinful Color's Tokyo Pearl (not covering the whole nail, but leaving the sides unpainted, as you can see I also did on the gold nails), a layer of Sally Hansen's Disco Ball, and finally a layer of matte-ifying top coat. I am super into the subdued shimmer of matte glitter.


2. Brightening Up Gray


Lonesome Dove by Confetti, Fantasy by Sinful Colors, 
and something black from Birchbox whose label fell off. Oops!

Okay, so there has been an absolute dearth of gray days here lately and I have loved putting together my deck furniture, admiring my boyfriend's gardening skills, and walking around on the grass in bare feet. Yay summer!

Pastels in general are in this season, and by itself this muted gray could be a classy but not flashy way to flaunt your style. Of course I could not leave it at that, so I tried out the super-thin black brush from to create a diagonal and then filled in one half of each nail with sparkle. This look and its smell were both heartily disapproved of by Brian.


3. Purple with a Pop


Mmm that name sounds like grape soda to me. Actually this was the look I decided on for the wedding I went to last weekend, where the food was even more delectable than any memories of summertime sodas. This is just Rimmel London's Wild Orchit, with a couple of whole nails getting the glitter treatment courtesy of Sinful Color's Fantasy, and a layer of matte-ifier over the whole thing. Delish!


For next week's nails (and beyond) I'm trying to convince myself to try the ombre look, but it seems like it will take so much patience! Has anyone out there been successful with it?

Monday, April 22, 2013

Review: Tea Fragrant Nail Polish

You guys know I love Walgreens. While I was there picking up some things to help me organize my new office, I could not resist also getting a new nail polish. I'd been thinking of a latte-like color to use as a base for French and French-inspired manicures, and this is what I decided on.


Tea Beauty's Vanilla Petals


It wasn't until I was checking out that I realized this is a scented nail polish - Vanilla Petals is not just the name, it's also the flavor. This was interesting for my boyfriend, who normally claims I am trying to poison him with chemicals because of the smell - even several hours after my manicure has dried. He even (if unenthusiastically) approved the scent.

I was pleased with how this look came out. (I also used my now go-to Revlon base coat, Color Club's French Tip, and a Sinful Colors top coat.) This was exactly what I'd had in mind, kind of glamorous and up-to-date but at the same time not shiny or overstated. (I am on a shiny hiatus after last week.)


Re-imagined French: diagonals instead of tips


This morning, though, as happens, I got bored and decided to move on to another look, perhaps even one that will last until the wedding I'm excited to be attending this weekend, and to my horror I found that the scented polish had stained my nails yellow! I am thinking it also might have been the combination of the Tea Beauty polish and the Color Club polish, but I can't say for sure.


Ew. 
Nail polish remover would not remove this stain.


I'm also not sure yet whether I'd recommend that others try out this type of polish. I think I'll get a flashier color to wear by itself and see if the results and after-effects are the same. (You could say I need a larger N, where N = nail polishes.) For now I'm going to wash the dishes and see if the dish soap has any success removing these ugly yellow stains.

Have any of you tried scented nail polishes? Have you ever had a polish leave such an ugly stain on your nails (even with a base coat!)? Leave a comment and let me know!

Tuesday, April 16, 2013

Spring Sparkles

So I've been really busy with cleaning and moving into my new house - and tons of other activities: translating and editing, planning my summer, etc. etc. All this does not mean I've stopped giving myself manicures, just that I've stopped telling you about them. So here is a collection of recent ones.

A theme that has emerged over the past couple of weeks is sparkles. I bought some various glitter polishes on a recent trip to Walgreens (kind of obsessed with Walgreens right now, to be honest), but really I've only used one of them: Sally Hansen's Disco Ball (on the right).


Also pictured: Sinful Colors' Fantasy

Recently I also added a new classic red to my collection, Color Club's Look Book. Here it is with a couple of coats of the glitter over it. I tried to layer so the glitter would be thickest at the bottom and thinnest at the top, but I'm not sure how discernable it is. I plan to work more on the graduated look in the future, probably not until my office is totally set up.


You can pretty much never go wrong with red nails. 
(At least according to my boyfriend.)

Something else I did was super-girly pink-on-pink with two pinks I bought last year when I was really into pink nails. (This was in part due to the influence of my guiltiest guilty pleasure TV show, the Bachelorette... Another post on that will possibly follow.) Adding to the effusive girlie-ness was, of course, a layer of sparkle on top. Not sure exactly why, but this look (minus the diagonals) really brought me back to 1996.


OMG pink!
Sinful Colors' Easy Going underneath Sinful Colors' Soul Mate

My third and most favorite of the sparkle looks was diagonal swipes of glitter (two coats) over Color Club's Status Update. Part of me thinks I just love this color for layering, since I also think it looks fab under gold. Brian invariably thinks it looks trashy, though, so there you go. There's no accounting for taste. 


You love it as much as I do, though, right?

Unfortunately with me there is no accounting for planning, either, since I put this polish on less than a day before I'd planned to help some friends of mine who are new parents clean their bathroom, so the look didn't last long. Oops.

Are you guys as into glitter this season as I am? What have your go-to manicure looks been so far this spring?

Thursday, April 4, 2013

Delayed Beautification: Two Online Nail Sign-ups

I work online, I am new in my town, and there have only been a couple of days so far this spring that it's been nice enough to just go play outside. (Today will be one of them, though!) The result is that I spend a lot of time on the internet. A lot.

Besides being terrible for carpal tunnel syndrome and other parts of my body, being a connectivity junkie has its perks: not only have I gotten way better at Words with Friends, I have also learned about some up-and-coming nail ventures available to consumers on the web. Without further ado, here they are!

I'm not sure I'll ever be skilled enough to freehand like this.
(Image from the Scratch website.)

Scratch
This LA-based company is seeking to combine the trend of nail wraps with actually trendy patterns and nail art, instead of the floral, boring, and/or leopard print patterns currently common to nail wraps. Their Kickstarter campaign has already raised more than four times its goal, with nearly three weeks left to go. Donate and you can try out one (or more) of their nail wraps as a thank-you gift.


Check your mailbox: You've got nails!
(Image from the Laquerous website.)

Laquerous
A subscription-based service, not unlike Netflix, that sends you nail polish in the mail for you to use and return. This is perfect for those who are indecisive about nail color, want to have the feel of expensive polish without the high per-bottle price tag, or want to try before they splurge on expensive polish. I requested a membership a little while ago and haven't heard anything yet, but I'm hoping to get the chance to try out this service soon. (Also I'm a little in awe that they're starting a business based on sending nail polish through the mail, since normally the USPS is not down with that.)

There will be lots of new things to try this spring! Not only have I just found my nail polish collection (which was packed away in a box for the last six months), but I am already behind on trying out the new polishes I picked up last week, so I'd better get going before Scratch and Laquerous put their products in the mail to me!

Any nail news around the interwebs that I've missed? Leave a comment and let me know!

Sunday, March 31, 2013

Short and Sweet: Two Fab Looks for Short Nails

Do you guys also have the pet peeve of having your nails different lengths from each other? Personally, anything asymmetrical drives me nuts. (Unless it's lopsided in a purposeful way, like the braid I wear over one shoulder, or a diagonal accent color across one side of a nail.)

One of the absolute worst is nails that are different lengths from each other, since it's not just an aesthetic but also a tactile asymmetry. This is one reason why I will pretty much never leave the house without a nail clipper in my bag, just in case some emergency surgery is necessary.

Unfortunately, when moving into a new house, washing a million dishes that have been in storage for six months, and wresting the tops of tons of unruly boxes, nails are prone to breaking.

Oops.

On the bright side, now I have nails short enough to show off some of my favorite understated short-nail looks (and all the dishwashing has made it necessary for me to wear two of them over the course of the last week).

Number one: White. There are many things to love about it:

  • Its a true neutral and goes with anything.
  • It always makes your hands look cleaner (a major reason I like having my nails done).
  • It matches your Easter shoes. (Happy Bunny Day!)
  • It's easy to pull off - not exactly a statement manicure - and yet totally on-trend this spring.
  • It looks pretty good even after washing countless loads of dishes; since it's a light color any chips or imperfections are less noticeable.
Imperfect, but still sexy.

Number two: Purple matte. So right after I last posted about not being sure purple was on-trend, I read a whole bunch of blog posts saying that it is. Yay! I'll soon have an eggplant-colored office, and purple has been one of my go-to shades for a while, so I'm ready to celebrate all the different shades from the richer ones to those reminiscent of the springlike scent of lilac.

Purple! Yay! 
(And even in artificial overhead lighting, 
you can see the reduction in shine.)

I used a new base coat and a new top coat in this manicure. The top coat is designed to dampen the manicure's shine - that is to make it look matte - and the bottle proclaims it as "new," which I think is supposed to mean trendy. I actually loved this look in about 1997. (Especially with black nails; I was a little dramatic as a teenager.) So to me, it's better than new: it's a comeback. From the '90s. So here are my new kids on the (nail polish) block:

The right stuff
Revlon 790 Matte Top Coat
 Revlon 955 Quick Dry Base Coat

What are your favorite short-nail looks? Are there any looks you like on short nails but not on long nails? Or vice-versa? 

Sunday, March 24, 2013

DIY Sugar Nails

If you ask my boyfriend, he'll tell you this happens a lot. One week, I am resisting something new, the next week I am totally experimenting with it, embracing it, and loving it. Go figure.

In this case, it's textured nails. I maintain that having rough-textured nails when you meant to have smooth ones is unpleasant, but after reading that Cathy was willing to try pink sugar nails (since she's a redhead she normally avoids pink), I decided to see if adding texture to my nails would really be that bothersome.

I did not go as far as buying anything new, instead I used glitter that was already part of my makeup collection (Possibly from the 90's? Glitter doesn't go bad, right?) and the Rimmel London polish and topcoat I tried for the first time last week. (Although obviously I did not use it as a base again.)


Sugar and spice and everything nice.


The steps are fairly easy. What I did was:

1) Paint all ten nails with a satisfactory amount of polish. I used three coats of the purple to get the color saturation as I wanted.

2) Let nails dry as normal. I wouldn't have tied my shoes or done some other smudge-prone activity, but I let my nails dry around half an hour and was fine to type and open the glitter bottle and stuff.


Products used: Rimmel London 370 "Wild Orchid" and Lancome Glitter in "Hologramme"

3) Apply glitter to each nail. I tapped a pinch of glitter on to one index finger, and tapped it again onto each nail of the opposite hand. Then I repeated the process with the other hand, and kept doing so (slightly obsessively) until there was an even amount of glitter on each nail. As you can see from the picture, the glitter gets places you don't necessarily want it, but it's easy enough to brush off (or remove with a lint brush or scotch tape if you want).

4) Apply topcoat. Pretty straightforward. Two things to keep in mind are: Topcoat makes the bottom coats vulnerable to smudging and smearing and a little bit of the glitter will get stuck in the topcoat brush. In fact, though, I was pleasantly surprised about how little this happened. It was really easy to wipe the brush on a piece of paper a couple of times and get it clean again.

This is a pretty easy and on-trend DIY look. I will report back with any developments, such as the gitter or polish coming off unexpectedly, as happened last week. (You can see the bottle claims it lasts ten days!)

Friday, March 22, 2013

Wear and Tear

Since I was so excited to use my new Rimmel London base/topcoat, I figure I should post an update on the results, which, sadly, were a little disappointing.

One problem -- which actually happens to me a lot when layering nail polish so it might not be the topcoat's fault -- is that adding another wet layer makes the dry layers underneath vulnerable to smudging and smearing again.

What happened this time, which seemed to be unique to the topcoat's interaction with the Covergirl gold polish I used, was the formation of tiny bubbles on the surface of the nails. This kind of thing is not  really noticeable to others but drives me crazy! I love having the surface of my nails feel smooth.


I'm not sure if you can see the bubbles in the gold, but you can definitely see the chipping!

Another problem is the chipping. The whole point of using a topcoat is so that I can go through a whole week (hence the name of the blog) without devising and implementing another manicure. I think that last week's green-on-green held a lot better - without topcoat!

So, I've asked this before but I'm still curious - What are your favorite topcoats? Did I get bad results because I was using a cheap one? How do you apply your topcoats? I ended up putting a layer between each of the polish colors, so maybe that is the problem. Let me know how you do it and what kind of results you get!

EDIT: (a couple of hours later)

Now I am super convinced this Rimmel base/topcoat should not be used as a base. I took a bath and this was the result:


Talk about a different way to remove nail polish!

All of the polish pealed off, easily and, as you can see, in astonishingly large pieces. This has never happened to me before, ever, so I can offer no explanation except to blame the base coat. I'll try to pick up a different one soon and try it out. Several people have suggested OPI, so I might try that, depending on the price. 


You can also see my naked nails, my new green bathroom, and my signature pink robe.

Normally I would include a shot of the products I used to achieve a certain look, so here is the shampoo I used in the bath. Also some bar soap, which did not photograph particularly nicely.

The upside is I now have naked nails without the yucky nail polish remover smell.

Sunday, March 17, 2013

Trendblending

I've already posted about nailscapes of mine that have seized on the trend of gold polish. One of my favorite trends this season is actually opaque white nails but I have not done a post on these yet because my nails are a little bit longer than ideal for this look right now and also because I've been feeling too creative to leave things be at plain white lately.


Colors!

To be honest, I am not sure that purple is really all that trendy this season. I do know that I went to a party last weekend and my two favorite manicures there were different shades of this regal color. Since I'd also been on the lookout for a base coat, I was delighted that Rimmel London had a two-for pack of a multi-tasking base/top coat and a pastel purple. Pastels are in this season but this purple actually turned out to be a little darker than I'd expected so it's hard to say whether I've really hit the mark with that one.

As usual when I get creative, I started off with something fun and could not leave well enough alone. Here is how my nails looked after applying the first two colors, which actually amounted to a base coat, two white coats, two diagonal gold coats, and a top coat.


Can't seem to get enough of this color combination.

Diagonal designs are another trend I've been grooving on but haven't put into action until today! As happened last week as well, I've found I am a little too perfectionist about this to love the results, but it seems easy enough that with some practice it will be fine. I probably had much worse results the first time I french manicured myself, which I'd guess was in about 1997.

I wore this gold-on-white mani out to get a bagel for lunch and that went well and everything, but then when I got home I decided to add some more color. I've been digging the idea of layering nail polishes lately, and since I just moved into my new house this week (!!) I have not yet unpacked significantly enough to know where the scotch tape is, which seems to be a necessary tool to create a more structured look. (I am also looking forward to finding the rest of my nail polish collection!). For now I decided to freehand another diagonal and this was the result:


The finished product

I like it because I think the color combination is good - springlike, even though it is still below freezing here and may even snow later in the week - and because in addition to exhibiting my blossoming diagonal-painting skills, it creates a pointed version of the pronounced nail moon which has also been trending this season.

Monday, March 11, 2013

Experimenting with Emerald

Sometimes you just have an off day. Working all day but not getting anything done, arguing with loved ones over a misunderstood sentence or a petty detail, messing up the execution of a very cute manicure idea and getting nail polish all over the place. That was me yesterday.


It's not often I grab a wet nail in utter frustration, but it doesn't never happen.

One theme for this blog is certainly my relationships with trends. Some trends, like metalics, I embrace and love right away. Others, like gel manicures, I am pretty sure I'll never be on board with. Yet another class of trends are those that right now there is part of me that cannot imagine being into but another part knows that I am stubborn at first but easily persuaded over time so maybe I will be eventually. (Did that even make any sense?) Almond-shaped nails are in this category.

Emerald as the color of 2013 is a trend that I don't love but that I can live with and, if I'm honest, it's fun to be creative with something I feel unenthusiastic about and turn it into something I feel ownership over and happy about.

So yesterday I gave myself a messy but serviceable emerald/teal french manicure. Most of my nails are teal with an emerald tip and three are solid emerald, two because I decided emerald with a teal tip wasn't doing it for me, and the third because I just kept messing up the tip so I decided to make the whole thing emerald. (Actually this was a case of having the tip almost perfect and ruining it by trying to make it a little better. Arg.)


The final result, with Color Club's Wild Cactus and
 Age of Aquarius clutched in my frustrated little claws.

Despite my frustration with applying the nail polish, getting it all over my hands and even on my clothing (luckily my Sunday sweatpants are already green-on-green, so it's not too noticeable), and getting textured imprints on almost-but-not-quite perfectly dry nails, I really like how successful this manicure was at turning me around on emerald. It looks chic and not at all Christmasy on the nails where it is solid, making me think having most of my nails be solid emerald with a few accent nails would also not have the side effect of "O Tannenbaum" getting stuck in my head.


Green sweatpants in the background. Would you have gone back and tried to correct
 the tip of the middle finger or just left it be?

Thursday, March 7, 2013

BlogLovin'

Follow my blog with Bloglovin

Let's see how this whole connecting to people via the internet thing works out for me!

A Better Way to Remove Nail Polish

Usually I leave my nail polish on until it is so cracked and chipped I just can't take it anymore and want to remove it as fast as possible! Recently, though, I've been reading about how using nail polish remover in a wiping, rubbing - or, worse, scrubbing - motion is pretty bad for your nails and therefore not the recommended way to get the job done. I can corroborate this - my nails are usually pretty strong, but I have notice weird peeling of the top layers after particularly vigorous polish removal. So I decided to try a different way.

I read somewhere - probably in a magazine (kind of a throw-back but I love to read magazines in the bath and other non-iPad appropriate places) -  that the best thing to do is wet a cotton ball with nail polish remover, place it on your nail and wrap a thin strip of aluminium foil around it, let it sit for ten or so minutes, and then remove the foil and cotton balls - and of course all the polish with them.

I've already written about my resistance to following directions when it comes to my digits, so obviously I did not do just that. Here is what I did do:

i. Materials:

one cotton pad, cut into six even pieces
rubber bands*
nail polish remover

ii. Procedure:

1. Wet five pieces of the cotton pad with nail polish remover.
2a. Place each of the pieces on the nails on one hand.
2a. Secure with a rubber band. (So, right after I did this, I realized that securing something to your finger tips with a rubber band hurts! So I pretty much took them off right away - of course I took pictures first, though. *If you choose to follow this method, you probably want to leave the rubber bands out. Since the pads were wet and nail polish remover kind of sticks to nail polish, they stayed on well even with nothing holding them in place.)


Do not do this. It hurts.

3. Wait the length of an Icona Pop song.
4. Remove cotton pads (and most of the polish!).

Something that I like about this procedure is that you use way fewer cotton pads this way! Whereas before I'd usually use at least one pad per hand, now I could just...

5. Place each of the pieces of cotton on the nails of the other hand, opposite side facing the nail as previously was.
6. Repeat steps 3 and 4.


This is the "reuse" step in reduce-reuse-recycle.

One Icona Pop song is actually not long enough to remove all of the polish, so what I did was...

7. Use the sixth pad and some of the unused corners of the other five for cleaning up any lingering polish.


Results of the experiment.

iii. Findings:

This method takes a bit more patience, but it feels a lot better on my nails than the (sc)rubbing method.
Next time, I will definitely not use rubber bands.
Next time, I will try to wait the length of two Icona Pop songs per hand.

All in all, I was pleased with the experiment! I will definitely be using this method again.

Do you guys all already do this? Am I behind the curve and/or unusually impatient about removing nail polish?